Course Software {
Here are instructions for getting your system ready to follow along with the core tools we use in the course.
A browser
We use a web browser to run our programs in this course. Any web browser is fine so long as you are able to enable the “developer tools”. If you’re unsure, just use Chrome or Firefox. You probably already have one or both of these installed, but if not, here are the links to install them:
- Chrome can be downloaded at https://www.google.com/chrome/
- Firefox can be downloaded at https://www.mozilla.org/firefox/
VS Code
We use VS Code as our text editor. It’s a nice, free text editor that’s very popular among developers. To get it:
- Go to https://code.visualstudio.com/
- Download VS Code to your computer
- Install it by following its instructions
If you prefer some other text editor, by all means use it, just make sure it supports your work.
Open VS Code now so you can set it up! When you start it it will automatically open a “Welcome” window which will explain a bunch of options, but we’ll focus on just a few things.
The VS Code Window
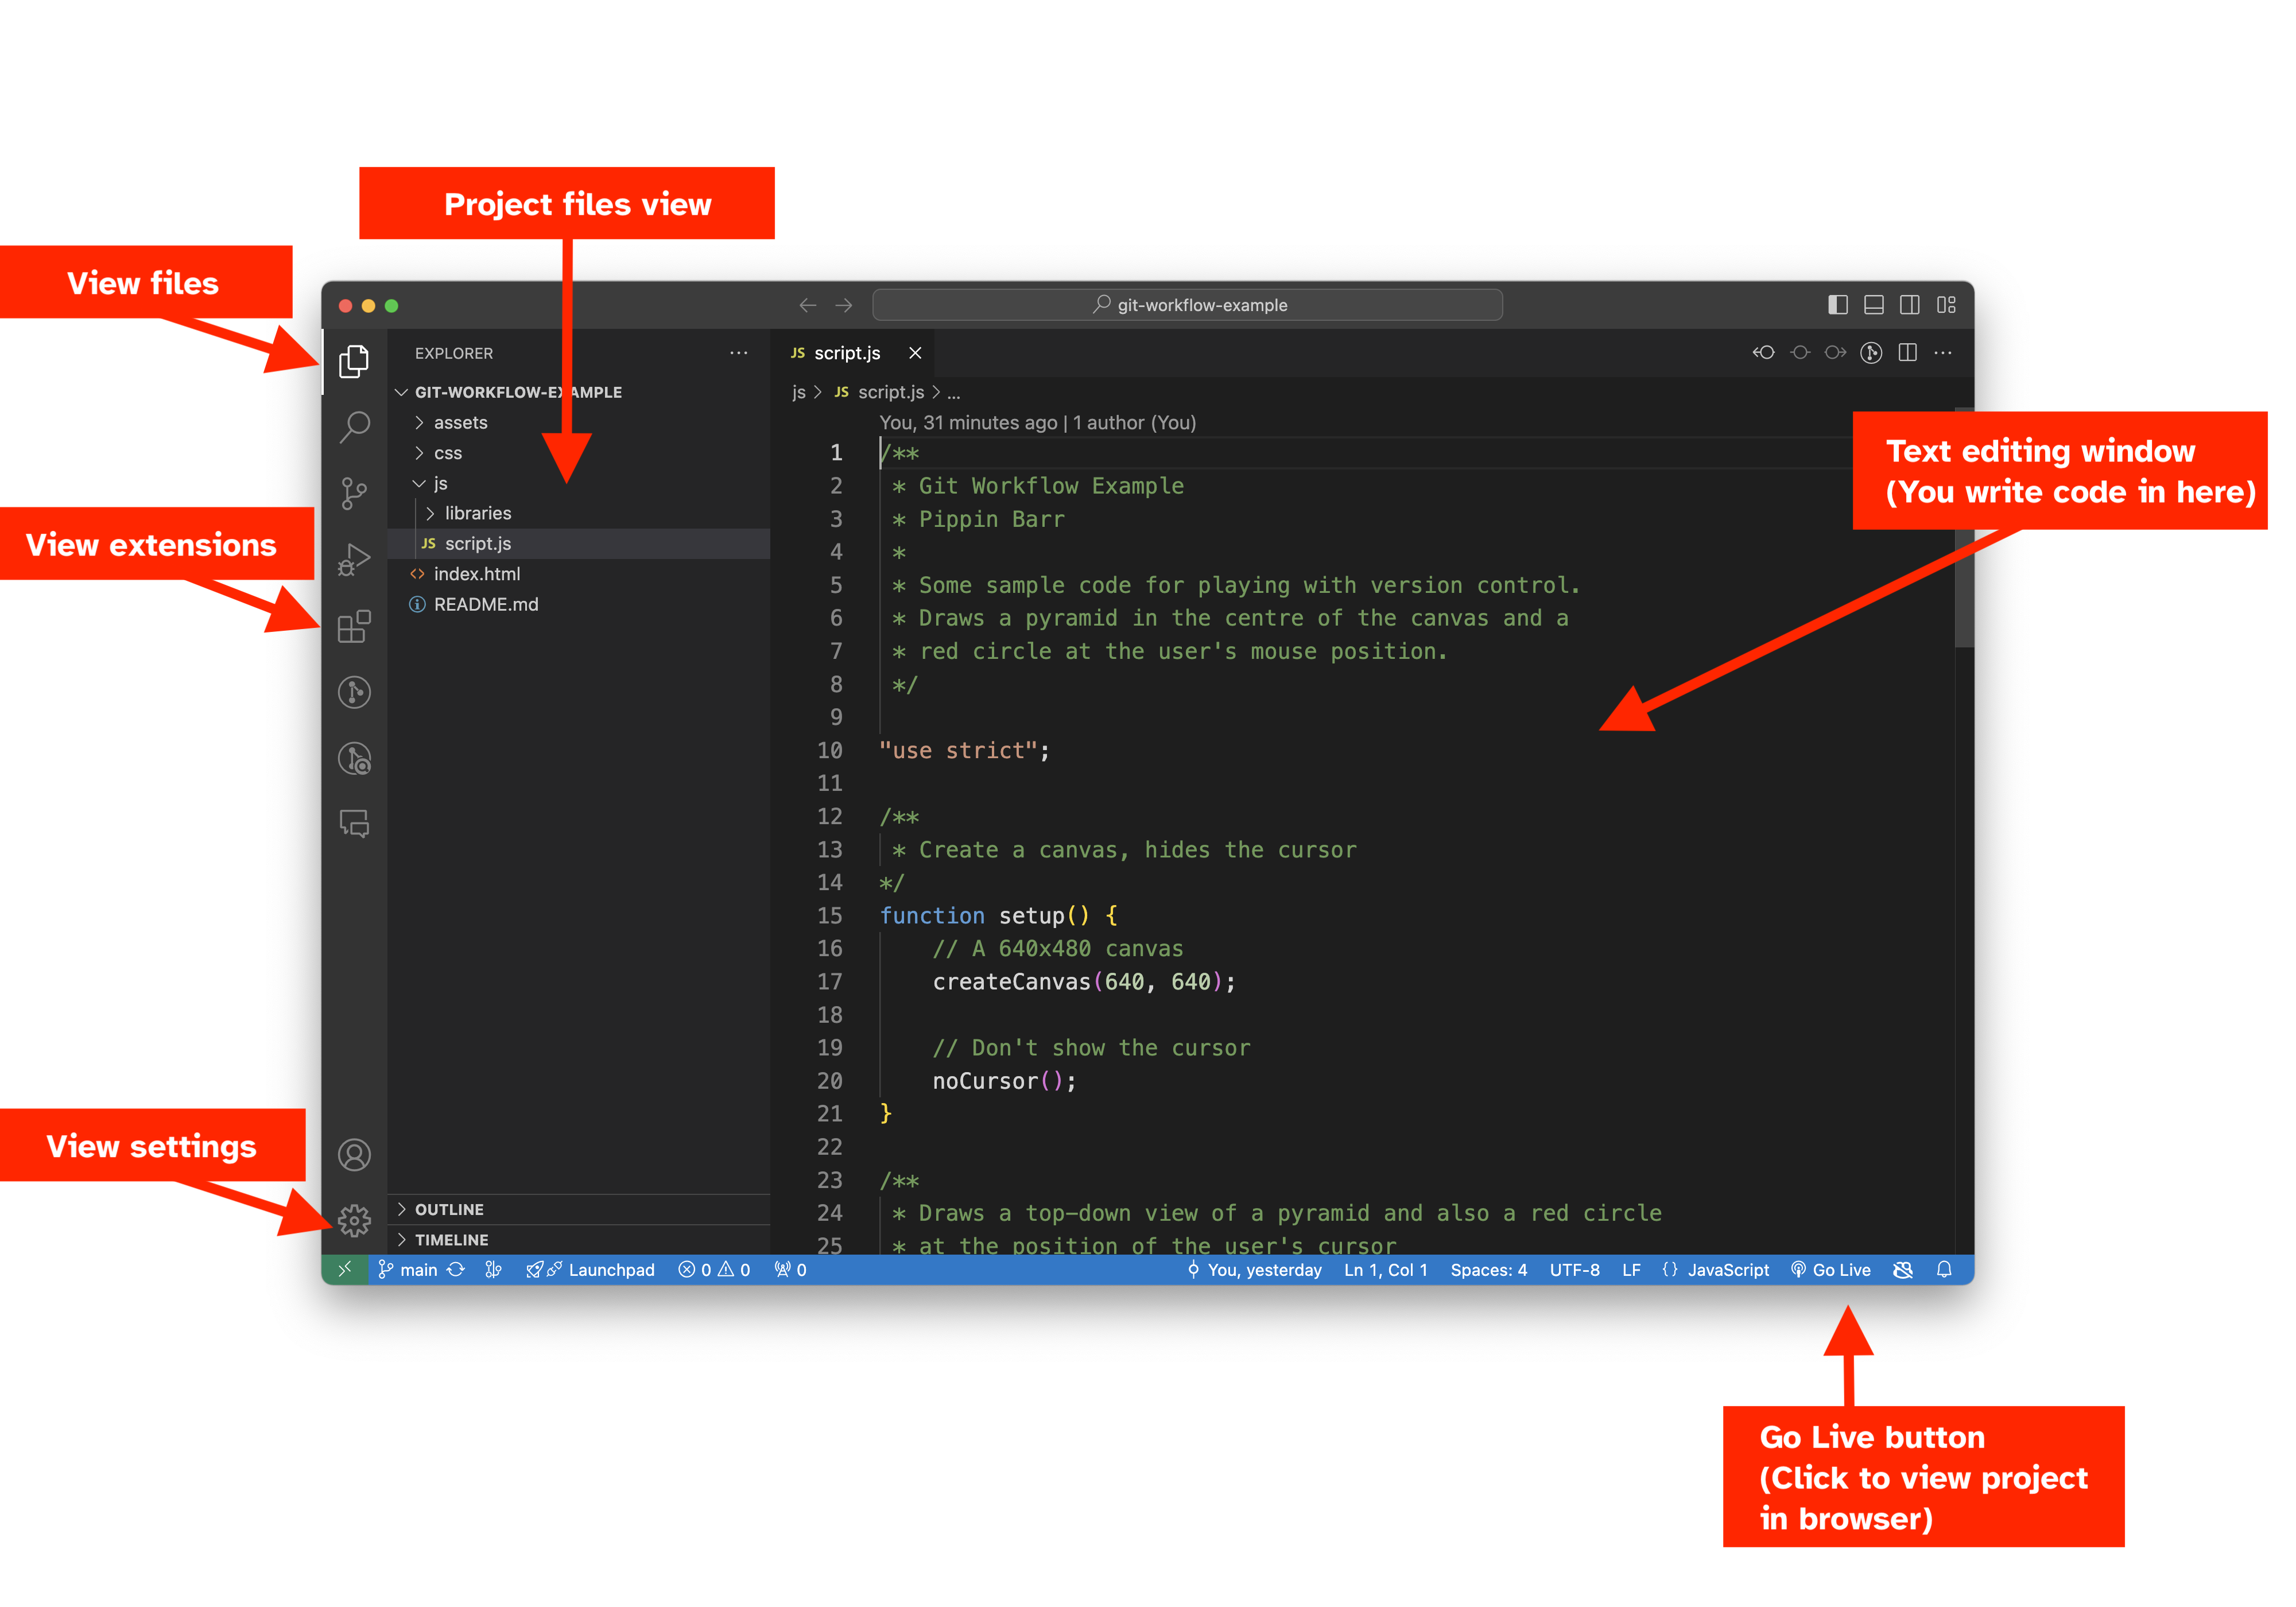
Here is what a VS Code window looks like. It includes a couple of elements you won’t have by default, but those will be mentioned below.
VS Code Settings
VS Code has a lot of settings and you can read about and play around with them as you wish. At a minimum, though, make sure your code is autoformatted by going into Settings > Text Editor > Formatting and enable “Format on Paste,” “Format on Save,” and “Format on Type.” These will help to ensure your code is always formatted and will save you a ton of heartache.
VS Code Extensions
One of the great things about VS Code (and most development-oriented text editors) is that it provides great base functionality but also a huge range of extensions that you can use to add specific functionality you want.
Go Live
Arguably the most important extension for you to install right away is the Live Server extension. This will add a “Go Live” button at the bottom right of your editor allowing you to see your code running in a browser (visible in the screenshot above). To install it:
- Click on the “extensions” icon on the left hand side of VS Code
- Search for “Live Server” (it’s the one with almost 39 million downloads!)
- Click on the “Install” button for the “Live Server” extension
- Look for the “Go Live” button that should now have appeared at the bottom-right of your VS Code window
p5js Snippets
Created by the epic Daniel Schiffman (codingtrain), this extension will autocomplete a bunch (all?) of the p5.js functions you’ll be using all semester, as well as pop up a little explanation. Not a total substitute for learning these and reading the documentation, but definitely a useful thing and very much an industry standard practice.
- Go to the Extensions menu again
- Search for “p5js”
- Click on the “Install” button
HTML CSS Support
We’re not really doing much in the way of HTML/CSS in this course, but it’s nice to have this extension installed anyway:
- Go to the Extensions menu again
- Search for “HTML CSS Support”
- Click on the “Install” button
… and more?
Feel free to browse the full range of extensions available by going to the “extensions” section of the program (see the screenshot above). There are a lot though and you may want to hold off until you know you need something.
GitHub Desktop
We will be using version control as a central part of this course. To make our lives easier we’re going to use GitHub Desktop so we have a nice user-interface to version control.
- Go to https://desktop.github.com/
- Use the link to download GitHub Desktop to your computer
- Install it
For now, don’t run GitHub Desktop just yet as you won’t have created your course repository, which is what we will use it for.
NOTE: You can also do all your version control inside VS Code if you’d like to. It’s more complex to set up and involves the terminal among other things, so ask your instructor or TA if you want help to do it.
Zoom
We will most likely use Zoom in some capacity during the class such as for office hours. It is the videoconferencing software most used by the university. You probably already have it, but if not:
- Go to https://zoom.us/download and follow the download instructions
To use Zoom you will usually simply be emailed a link. When you click the link your browser will try to open Zoom and connect to the videoconference.
Discord
We will use Discord to communicate outside of the classroom. Discord is a fairly standard instant messaging, voice- and video-chat, and screen sharing application.
- Go to https://discord.com/register and follow the instructions to register for a Discord account
- Go to https://discord.com/new to download the Discord application for your computer
- Run Discord and log in
An invitation link for the course Discord will be availabe on Moodle. Please don’t share it with anyone outside the course.
Summary
We now have the key software for this course.
- We use a browser (like Chrome or Firefox) to run our programs
- We use VS Code as a text editor to write out programs
- We use GitHub Desktop to manage our code
- We use Zoom for live videoconferencing when needed
- We use Discord as our home base for communicating about the course