Working with code in Atom {
In this module
- Running Atom
- Opening the template project
- Including the p5.js library
- Adding some code
- Running code in the browser with atom-live-server
Running Atom
Launch Atom using whatever approach you prefer, such as:
- Find it in your Applications folder or in Program Files
- Click on it in the Dock or Task Bar at the bottom of your screen
- Use Command+Space (Mac) or “Windows Key”+S and type “Atom”
You may see some default windows the very first time you open Atom. None of them are useful to us in our work, so tell them not to appear by default if you want, and close them until you just have the untitled file open.
Type some words into the untitled window/tab. That’s called text editing!
Programming is just fancy text editing with special words.
Note that if last time you used Atom you already had something open, it will probably open that project/file again. Close it if you don’t want to work on that project/file.
The template project
When we write JavaScript in this class we will use a basic set of files and folders we will use every time to start a new project (any time we’re writing new code). So follow the following steps to get the template project:
- Download the template project
- Unzip it on your desktop or wherever you like (often it’s enough to double-click the
.zipfile to unzip it) - You should now have a folder called
template-p5-project
If you open the folder, you can see it has a bunch of files and folders in it. We want to open this template project in Atom.
Open the template project in Atom
When writing our code it is very, very important that we always open the entire project we are working on in Atom. That is, we should always open the main folder that contains all the HTML, CSS, JavaScript, and other files that make up the project.
In this case, that is the template-p5-project folder, so we should open that. There are a couple of ways.
- Drag the
template-p5-projectonto the Atom icon on your Dock or Task Bar - In Atom go to
File > Open...and select thetemplate-p5-projectfolder, then choose “Open”
The key is that we want that specific folder open in its own window in Atom. You’ll be able to tell if you did it right because the lefthand sidebar will show the folder’s name at the top, and then underneath will be all the files inside the folder.
Note: you can also open one of the files in the main folder like index.html, but this may lead to it opening in the wrong window or something else confusing. Always use the method above to open your project when you start work.
Inside the template project
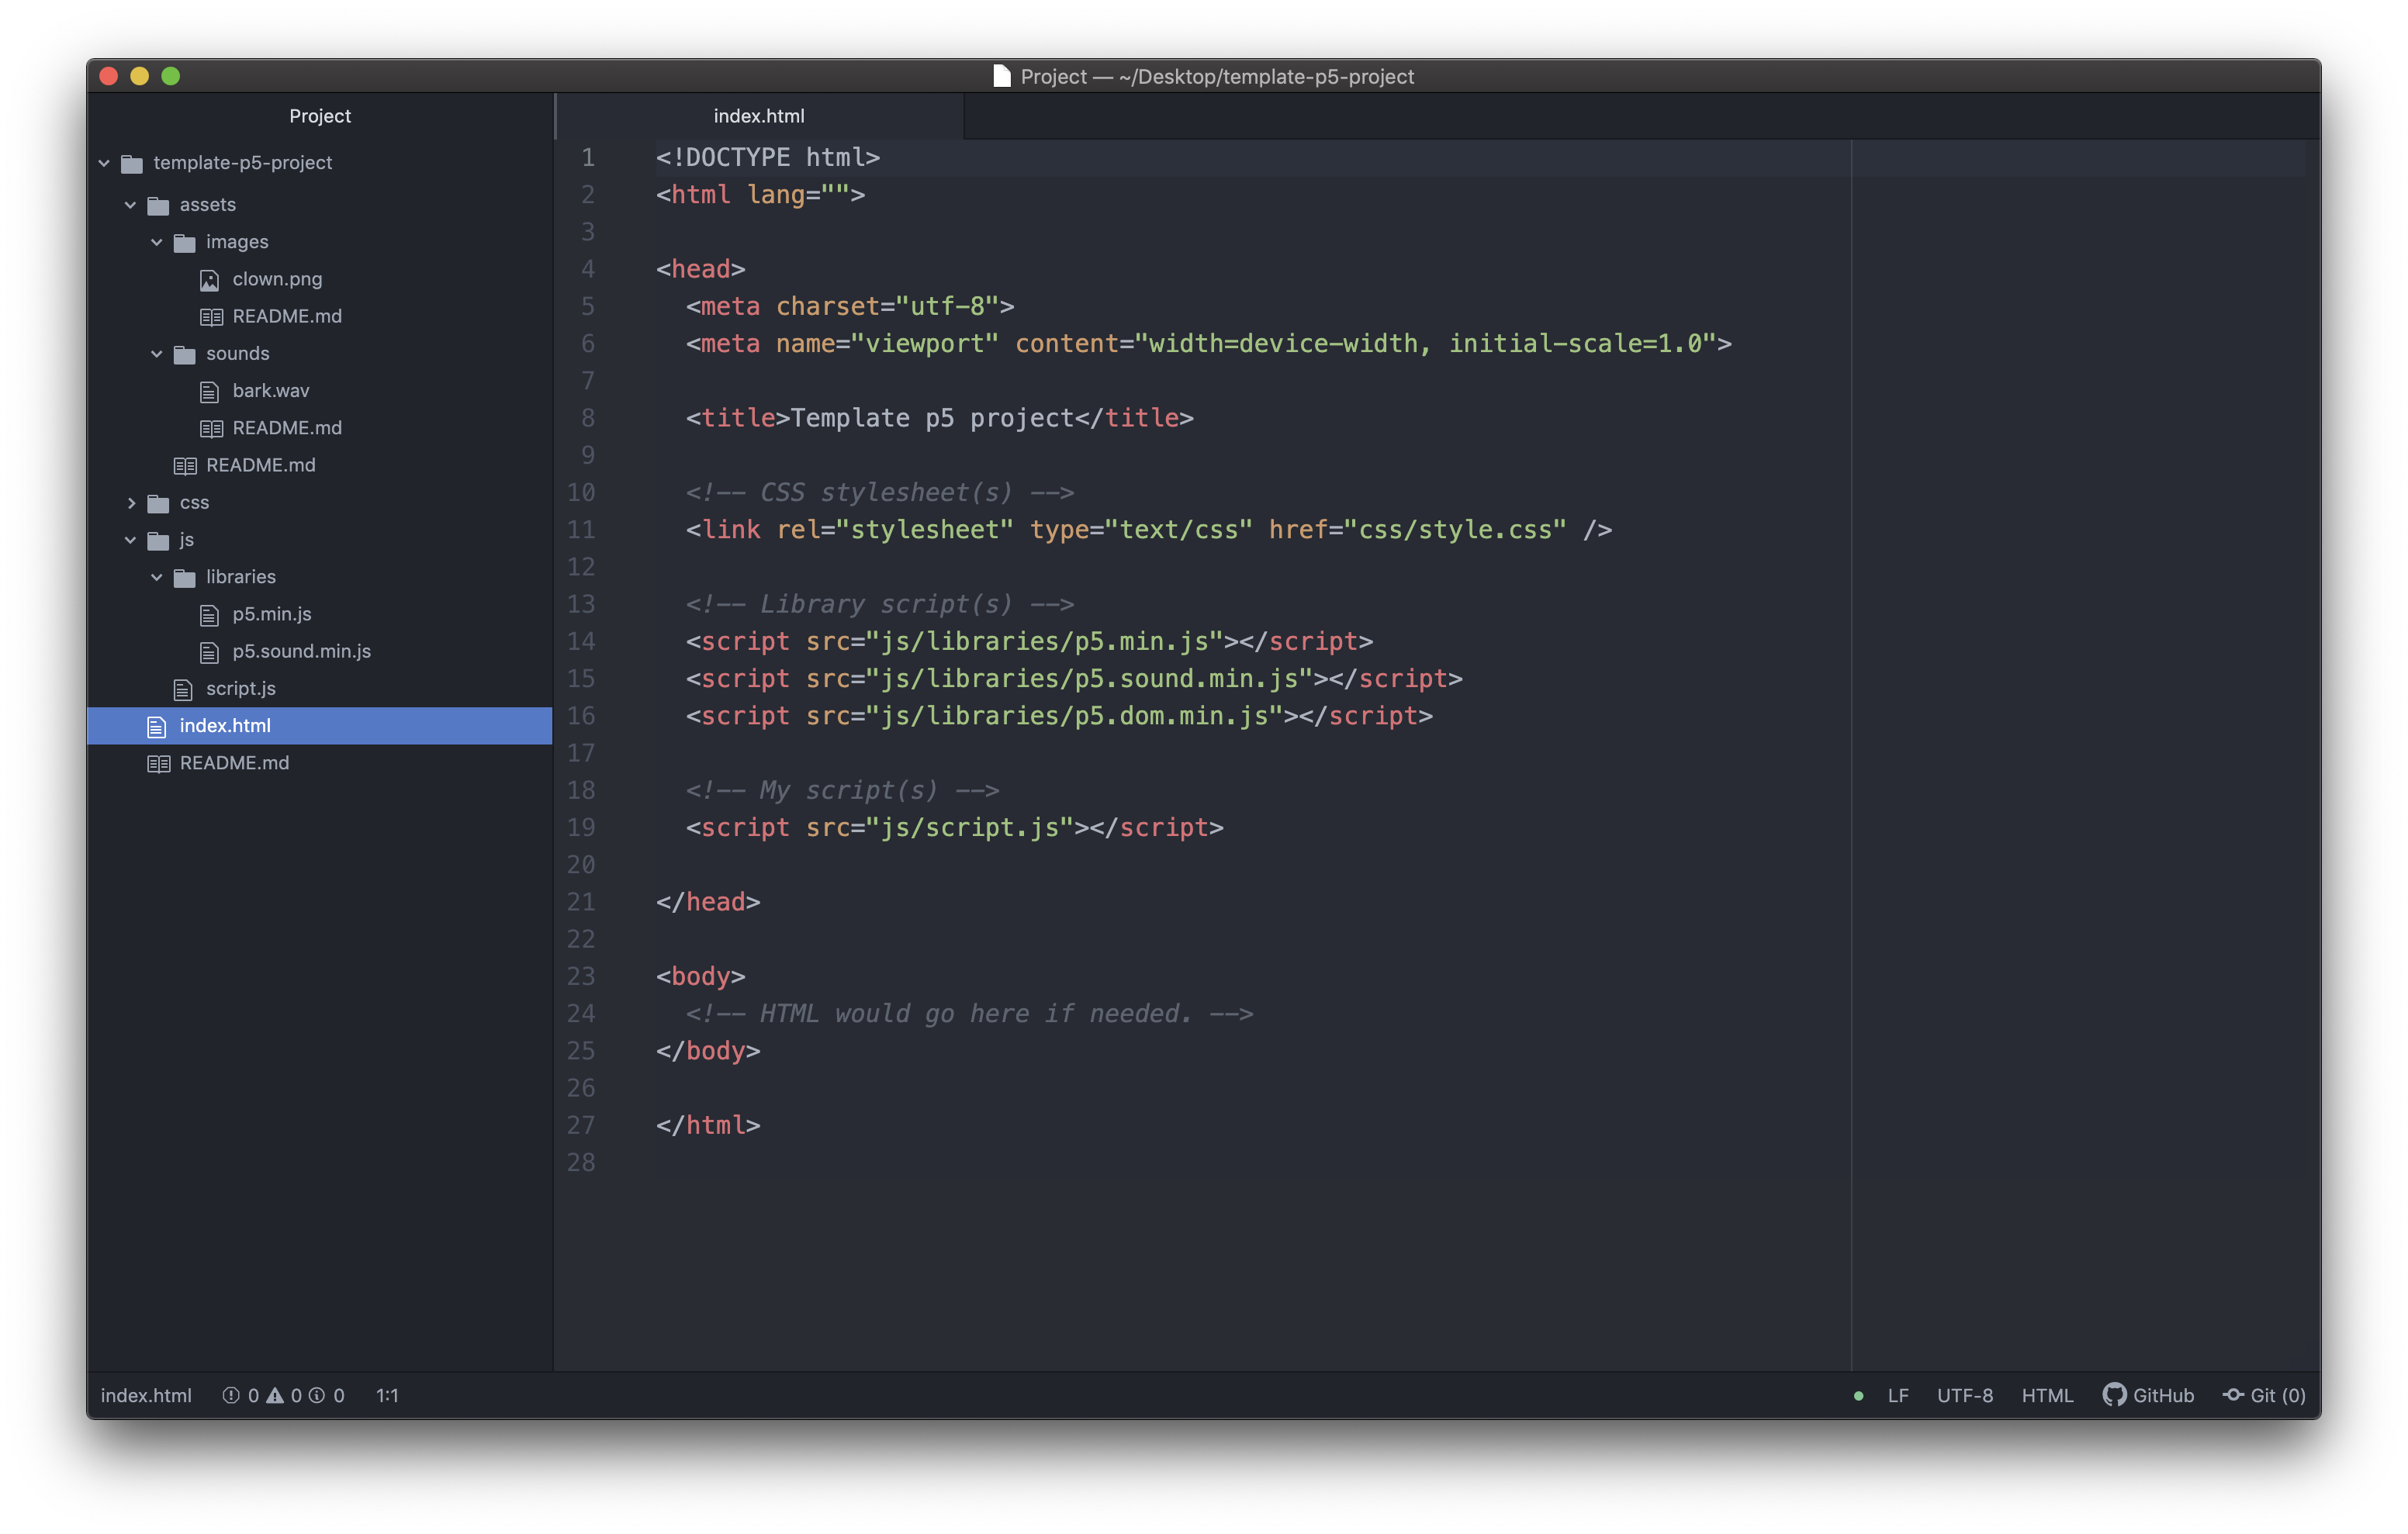
- This is roughly what you should see when you open the template project
- In this case we have the
index.htmlfile selected in the project on the left - Most importantly, you can see the contents of the file you are editing in the main editing window (the biggest area)
- And you can see the file structure of the project in the left pane (the smaller, skinnier area with
index.htmlselected)
To view any specific file, just select it in the lefthand sidebar.
The template project structure
- Our standard template project has the following structure:
template-p5-project/
   css/
      style.css
   assets/
      images/
      sounds/
   js/
      libraries/
         p5.min.js
      script.js
   index.html
- At the top level we have
template-p5-project- that’s the folder that contains the total project - Inside we have three folders called
css,assets, andjs(the forward slash is used to indicate a directory, but it isn’t part of the name). These folders help to organise the files in our project. - There’s also a file at the top level called
index.htmlwhich is the actual web-page that will be displayed when we run our project - Inside
cssisstyle.csswhich controls the styling of the page - we won’t worry much about this for a while - Inside
assetsare two more folders, calledimagesandsounds, which contain nothing, but we can imagine that we would put images and sounds in them! - Inside
jsis a folder calledlibrarieswhich contains the p5 library we’re using in this course, the file for this is calledp5.min.js- you can look at it, but it’s pretty freaky - Also inside
jsis our own script file calledscript.js
(In the current template project, there are also README.md files throughout that explain the different folders, as well as a sample image and sound in the assets/images and assets/sounds folders.)
p5.min.js
- In the
js/folder is a folder calledlibraries/and in that folder isp5.min.js - This file contains the code for the p5 library
- You can take a look at it, but it probably looks like nonsense
- Part of that is because of the
minpart of the name, it means min-ified which means it has been compressed and is not so readable anymore - Notice that in
index.html- there is a
<script>tag that includesp5.min.jsso that we can use it in our code inscript.js - there is a
<script>tag that includesscript.jsso that we can write our code in there and have it do things on the web page
- there is a
- These two
<script>tags are connecting the JavaScript to the HTML page being displayed
Writing some code
Just to see how running our code works in action, let’s add a tiny bit of code to the script.js file so we can see something happen. Initially it will just look like this:
function setup() {

}

function draw() {

}
Let’s add one line of code so it looks like this:
function setup() {
  background(255, 0, 0);
}

function draw() {

}
Don’t worry about the specifics, we’ll learn them later on! Just add that one new line.
Running our code
Because we’re using JavaScript, we will run our programs in a web browser. In this course we recommend either Chrome or FireFox.
While we could take the project and upload it to a web server, this would be very time consuming if we had to do so every time we wanted to change our code and check how it works.
Instead, we’ll use the “atom-live-server” you should have installed in Atom already. So:
Go to Packages > atom-live-server > Start server and see what happens…
Note: It would be a great idea to learn the shortcut for this “Start server” command as it will speed things up a little. The shortcut is listed next to the menu item.
View the results in Chrome
atom-live-server will have run your browser by default and it should be displaying the results of our tiny program. If your default browser is not Chrome or FireFox, please change that for this course. It needs to be one of those two browsers for reasons we will cover later.
You should see something like the following:
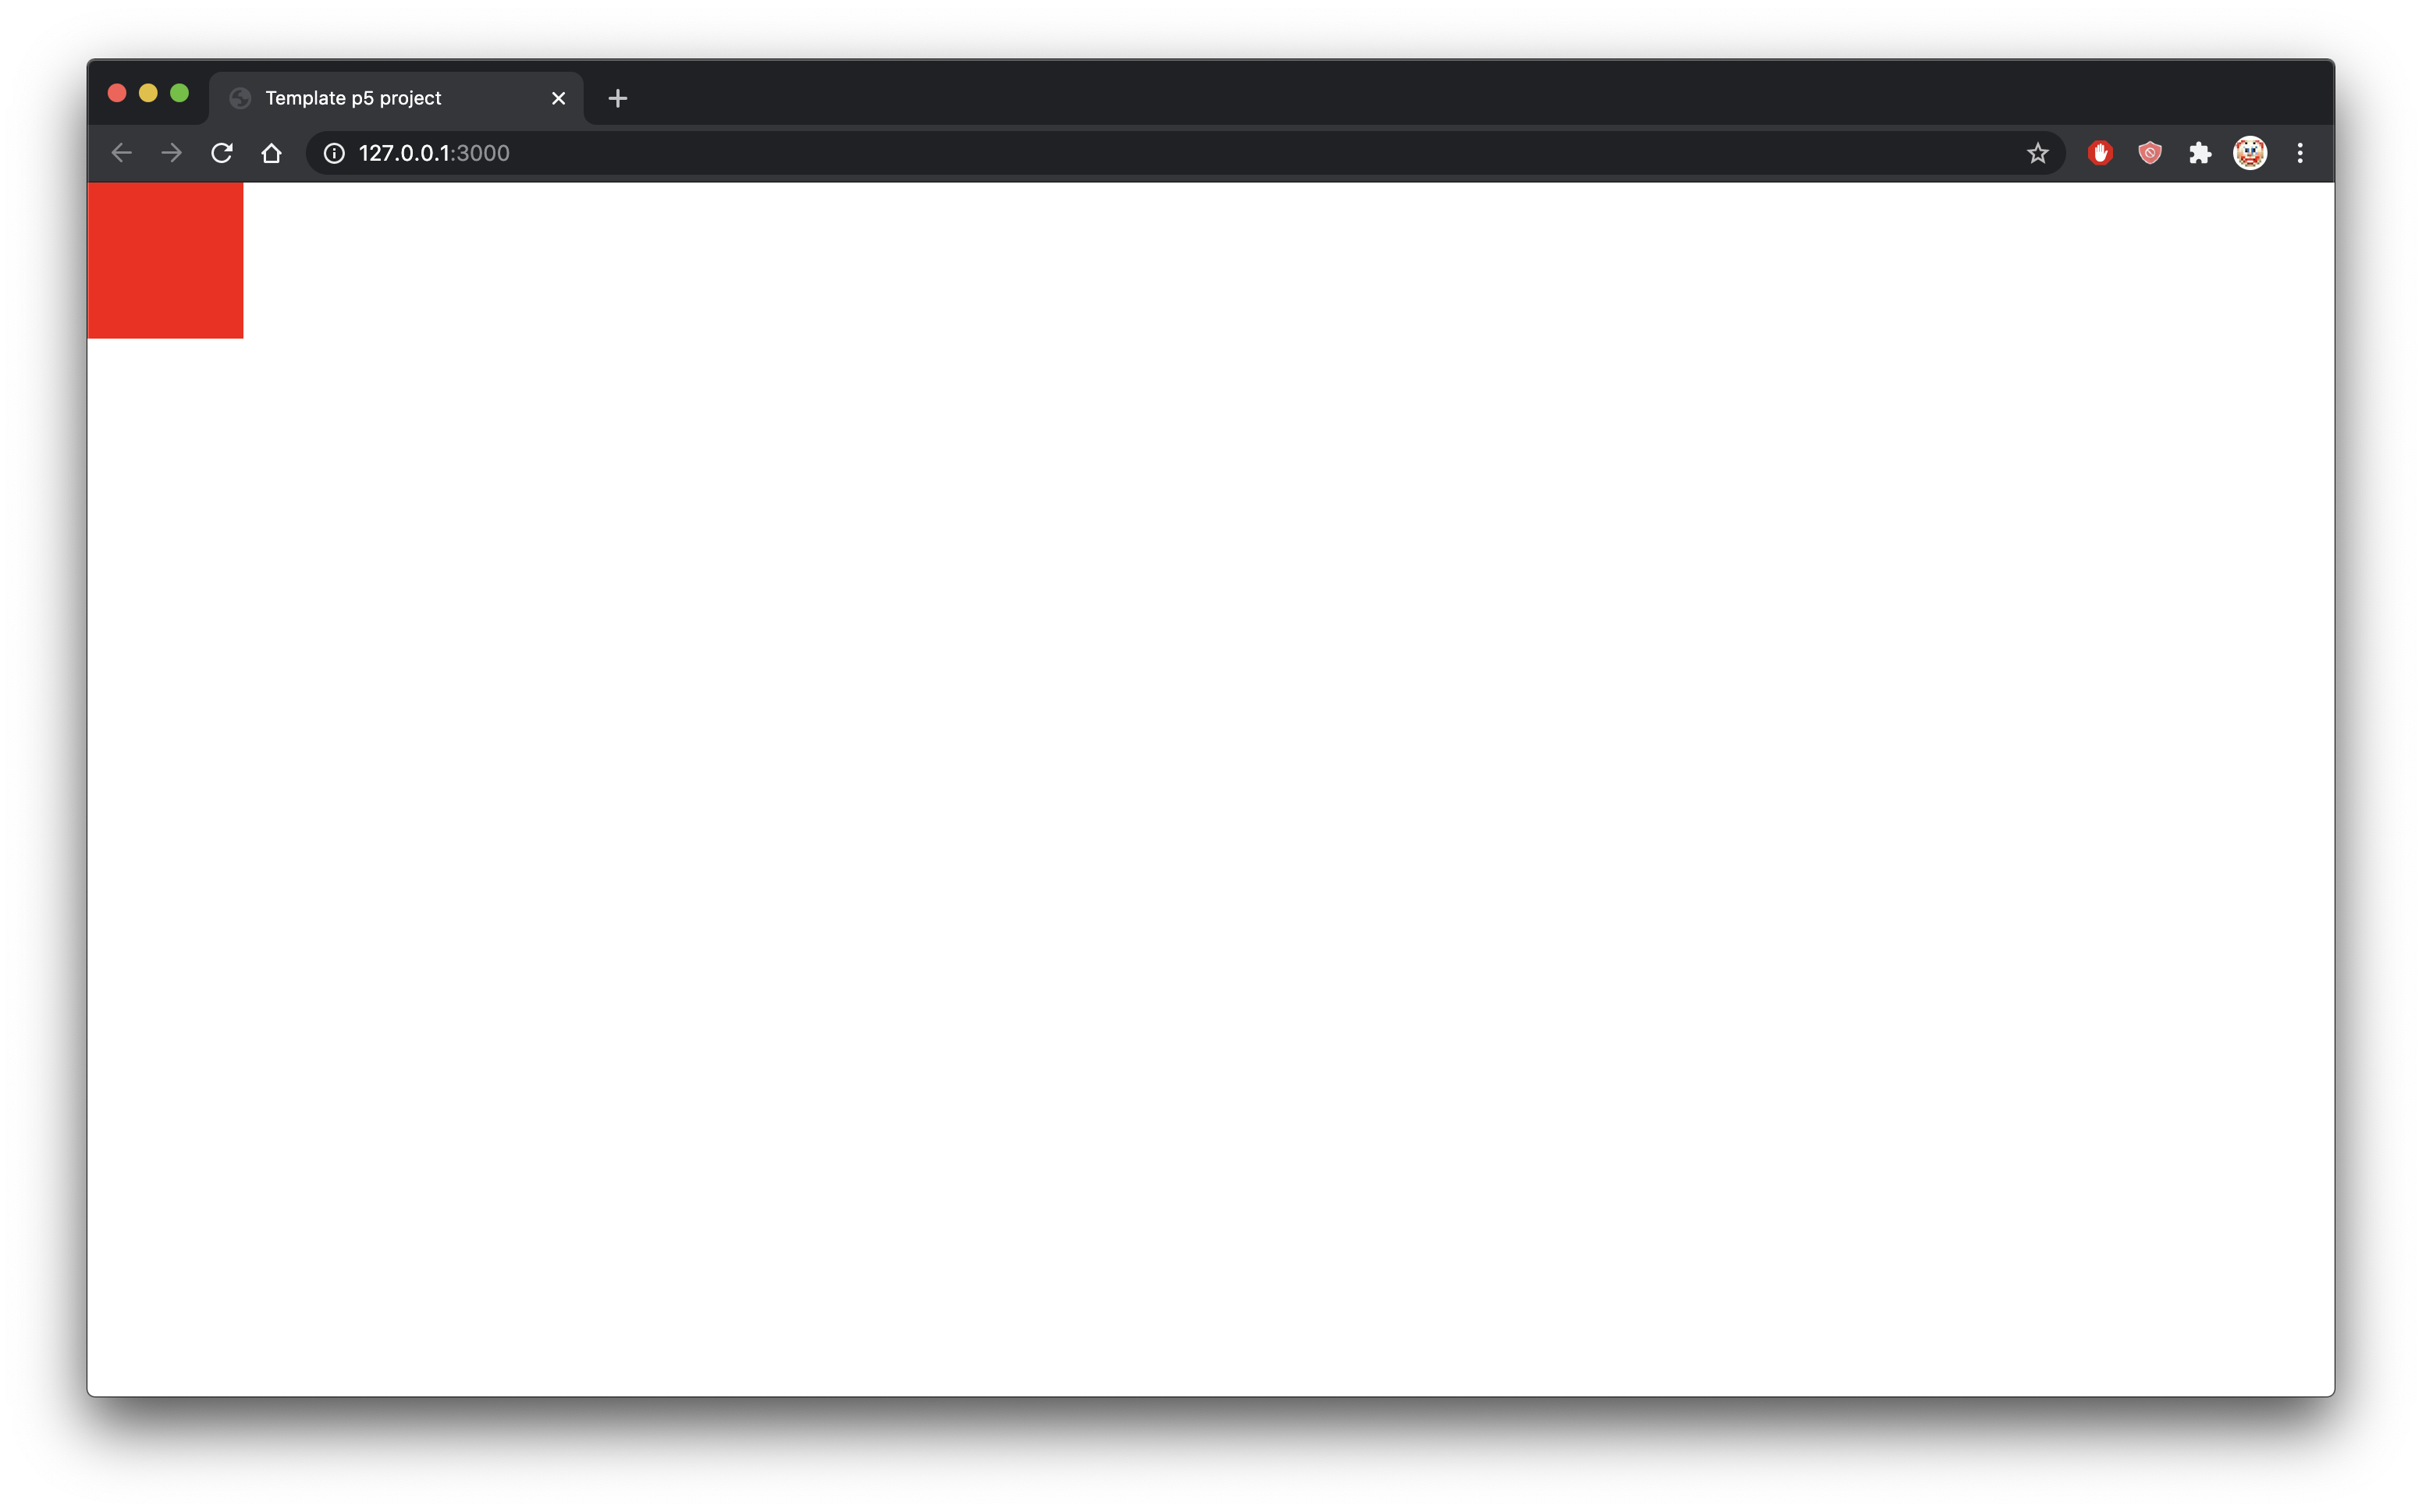
That is, a red square in the top left corner of the window. That background(255,0,0); line made the red square appear there, and we’ll learn more about all that soon enough. The code worked!
atom-live-server is live
The beauty of atom-live-server is not just that it loads our project whenever we make changes to our code (and save them), so we can easily check what the results of our work are.
Back in Atom, change the numbers in the line
background(255,0,0);
For example we could change them to
background(127,222,10);
If we go back to our browser, we see… the red square is now a green square! We changed its color with the power of numbers. And, importantly, just changing and saving the file automatically updated in the browser. Handy.
Summary
- We have a text-editor for our code (Atom)
- We have a template project to start from (available in the
templatesfolder of our course website) - We have a JavaScript library to make visual programming easier (p5.js)
- We have a local server for testing our work (atom-live-server)
- We have a browser to view our work (Chrome)
Make friends with and learn to love them all!